Inside Behance: how the creative network works
Can I find you on Behance? If you are a designer, artist, or otherwise fall into the diverse family of “creatives,” then you may have heard yourself ask this question. The answer? If it is no, then continue reading this article: here we explain what Behance is, how it works, and what benefits it can offer you. If, on the other hand, the answer is yes, skip the first paragraph and read on anyway: we have scattered tips that can come in handy to make your portfolio more competitive. Let’s get started.
Step one: Behance, what is it?
It was the year 2006 when Scott Belsky and Matias Corea created a network for creatives to which they gave the name Behance. The goal? Empower creative careers, organize the creative world, and provide transparency where there is none. Behance is just that: a platform where creatives from all over the world can showcase their projects, compare and connect with other talents, gain insights, exchange feedback, stay on track, and open themselves up to new job opportunities. It is, in short, a space where you can work on your personal branding and, if you do it right, get new clients.
Step two: Behance, how does it work?
Register and choose one or more topics of interest to you. A bulletin board will open for you with a personalized feed.
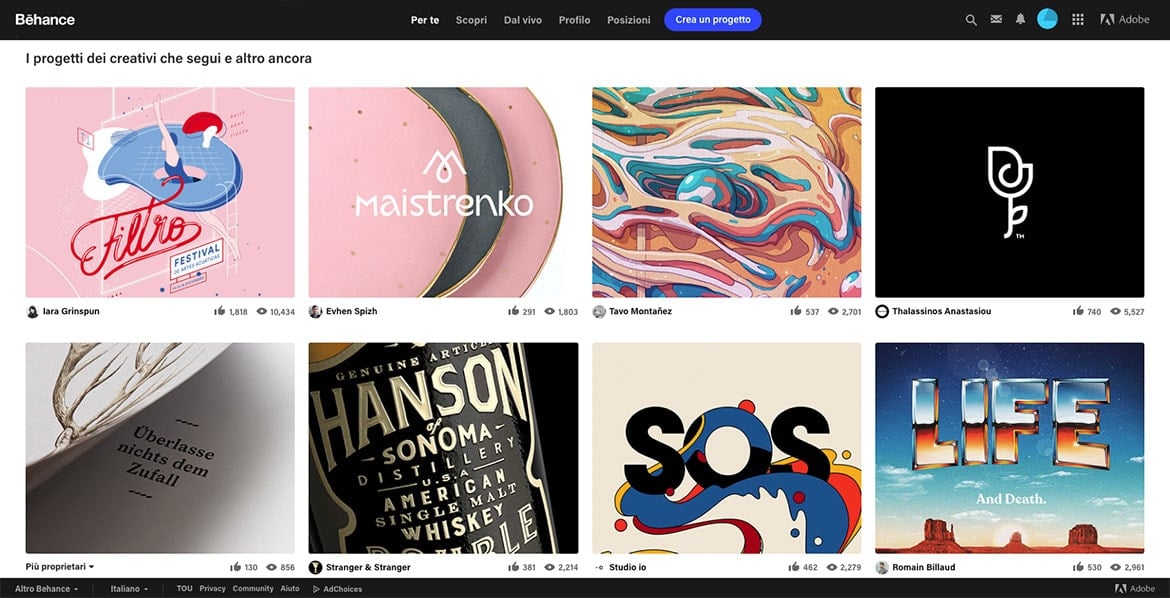
The other sections you can access we briefly introduce here.
Discover: find “The Best of Behance,” which is all the projects selected day by day by the network’s curators.
Live: this is a digital library of live events you can attend and videos chronicling the work of other professionals. The material is organized in order by category.
Profile: this is where you introduce yourself. A word of advice: don’t be information parks or generic, make it clear what your specialization is (logo design, UX, app interfaces, illustration…) and what skills you excel in. Of course, the projects you include in your portfolio should be consistent with what you tell in the profile.
Positions: this is a real bulletin board full of job postings. This section is useful for hunting for open positions; through the filters (type of position, country, city, creative field) display only the offers that interest you.
Create a project: this is your showcase, here you show what you can do: this is the section where you upload all your past and present work. Everyone is just saying: post only the best. You don’t have to show everything you can do, just what you do best.
How do you upload a project?
If you are taking your first steps in the network, we recommend that you consult Behance’s guidelines, where everything you need to know about the platform, from managing your profile to creating a project, is spelled out in full. There you can find answers to any doubts you may have. In the meantime, let’s enter the Create a Project section and take a peek at the editor.
First step: Content
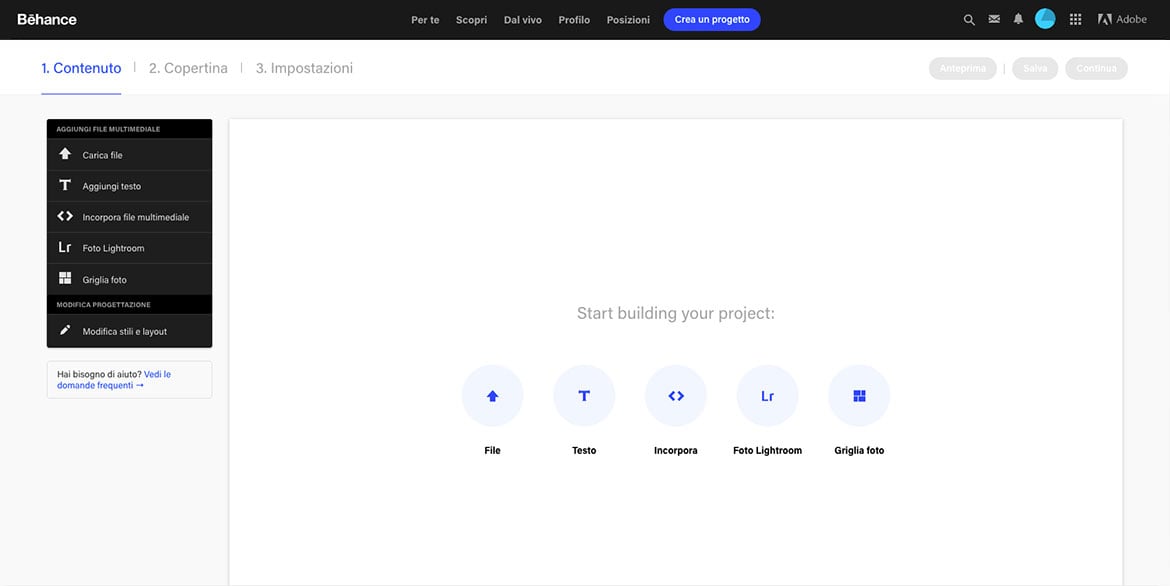
Upload your file. Give it a clear title; we recommend that you always indicate, in addition to the name, the type of project and the year it was created. For example: Name_logodesign_2017. Include a short but comprehensive description that clarifies your creative intent, i.e., all the reasoning that led you to certain choices. Imagine that caption as the rational that accompanies the presentation of a work to the client. Only then will you be able to enhance the work.
If you are presenting a highly articulated project, in order not to risk losing some aspects, we recommend that you also upload detail images. If you have them, you can incorporate drafts, sketches, or a video showing the stages of implementation-from now on, remember to record the screen at the design stage! In general: try to create some sort of narrative that shows not only the finished work but also its implementation and applications. In short: do storytelling!
In the “Edit Styles and Layout” section you can customize the presentation in layout and text style, so you can add a bit of personality.
Second step: Cover page
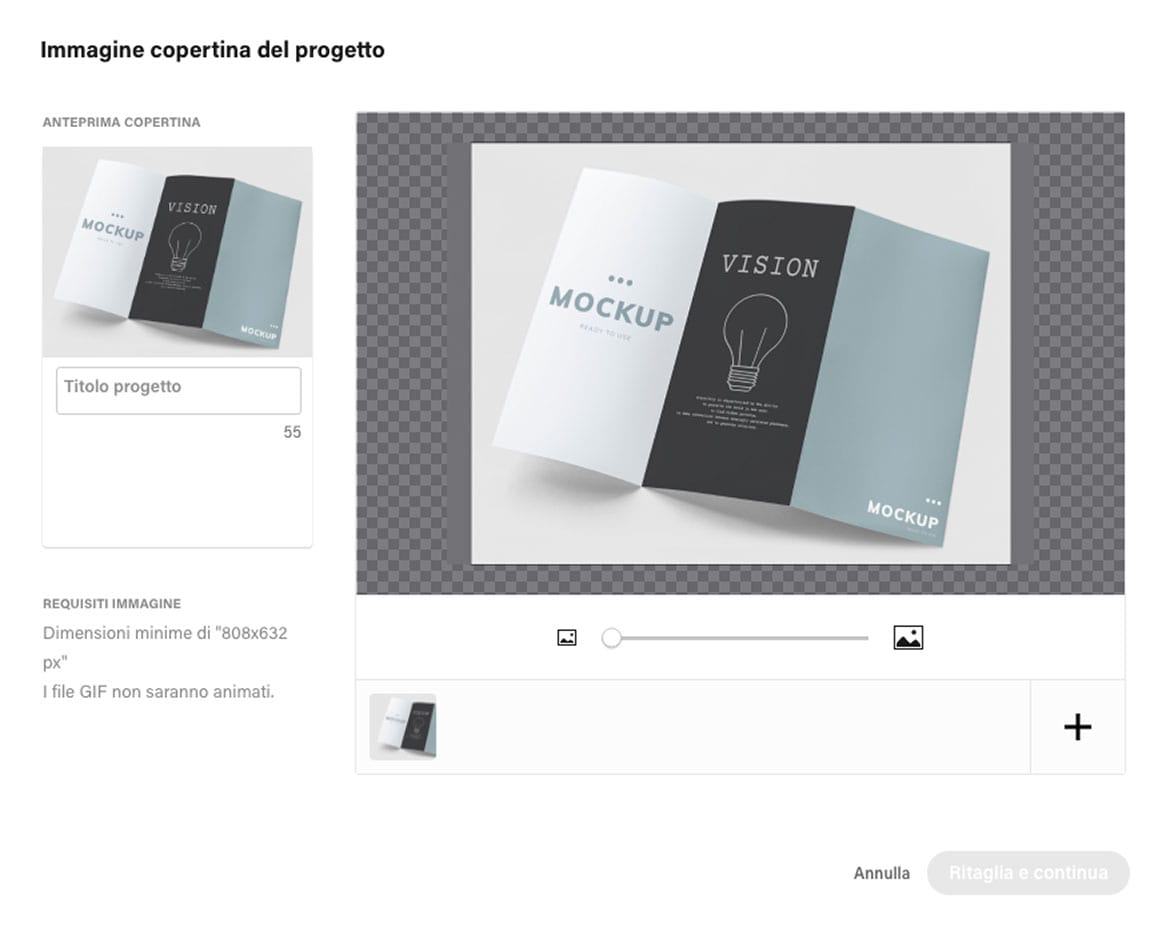
Here you work on the cover image, which really plays a crucial role: it is the first image people view, so it must be eye-catching, intriguing, and anticipate (without revealing too much) the project. On that note: before you get down to business, we suggest you do some research on Behance and collect a list of the best covers, so you can get inspired and be more competitive.
Third step: Settings
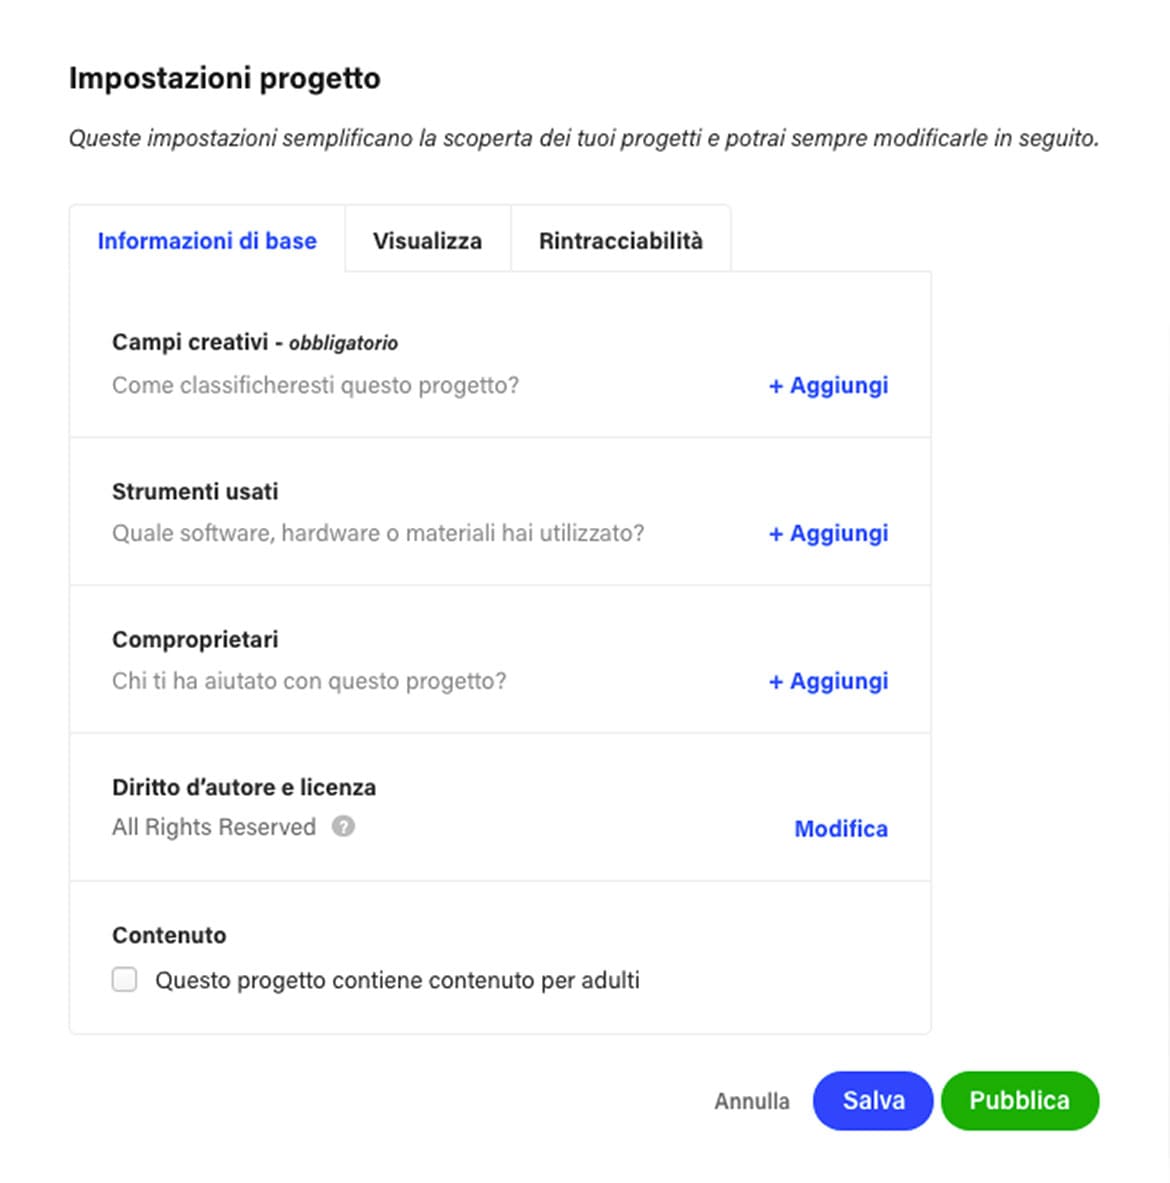
This is where you will enter basic information about your work: the tags to put it in a specific category (these are very important to get it found on the network), the tools you used to create it, the professionals you collaborated with, its description… Once you have entered all the information, click “Publish” and the project will be added to the portfolio. Finished!
Ah, very last piece of advice: don’t upload all the work at once, dilute it over time so that the attention of those who follow you is not dispersed but focused on each individual project.
That’s all from Behance.

