
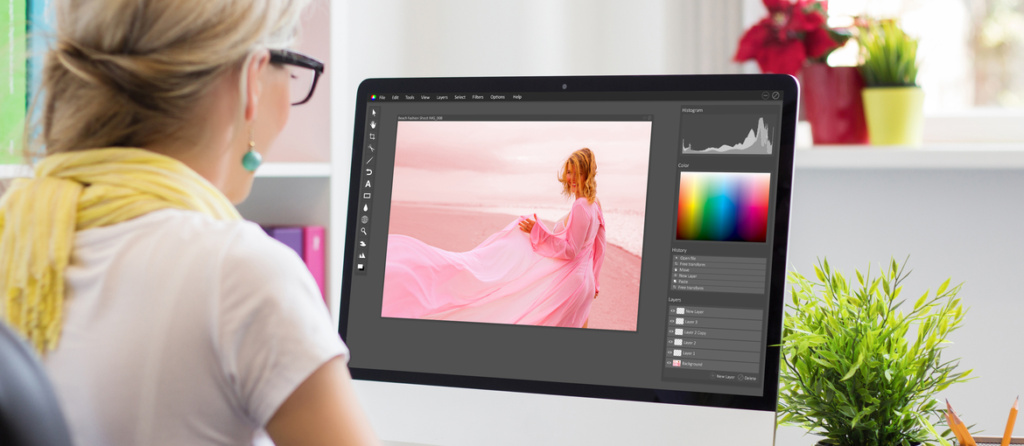
The image is ready to be printed, it looks sharp and defined on the screen, yet once it is imprinted on the media, it is pixelated and of poor quality, ruining the project. What happened? In these cases understanding the meaning of resolution and its implications when printing is essential to avoid spending money on a poor result.
What exactly is meant by the resolution of an image?
Resolution refers to the number of pixels in an image. It is generally stated in PPI, Pixels Per Inch, a unit that indicates the number of pixels present in one inch, (1 inch = 25.4 mm). The higher the number of pixels in an inch, the more information is present, and therefore the more detailed and sharp the image. When there are few pixels per inch, the image appears as a grid in which pixels are visible.

However, the PPI of an image, expressed without context, has little meaning. One must relate this value to other parameters to have a complete understanding and to be able to print with a good degree of confidence.


Parameters to consider
Width and length of the image.
The PPI value is always related to the width and length values of the reference image, expressed in pixels (picture elements). Unless the image is resampled (an operation we will discuss later), the ratio of the image size to its resolution remains constant. For example, a 2000 x 1000px image at 72ppi is equivalent in quantity of information and quality to its 480 x 240px counterpart at 300ppi.
It should be kept in mind that the pixel is a digital unit of measurement, not a physical one: that is, it does not correspond to a dimension expressed in mm, or cm, but is a minimum unit, dependent on the type of screen being used.
File size
The resolution and pixel size of an image determine the file size, expressed in kilobytes (KB), megabytes (MB) or gigabytes (GB), which indicates the space the image will occupy on disk. The greater the number of pixels in an image, the more detailed and sharp it will be able to appear in print at a given size. At the same time, as the number of pixels increases, so does the size of the file, thus the space it takes up on disk, and more time will be needed to process and print it.
Screen resolution
The screen itself on which we look at images also has a certain resolution, indicated in pixels. Generally, the larger the screen, the higher the resolution. As in images, screens have a finite number of pixels per inch, PPI, which often equals 72, but can be much higher in the latest generation of screens.
If the resolution of an image, say 1024 x 768, matches exactly with that of the screen, it will be displayed at 100 percent. Should the PPI also match, the image will appear sharp, but as it zooms in, it begins to lose detail.
To prepare images for display on the screen, the final image size and the ppi of the screens on which it will be displayed should be kept in mind. Often when preparing images for the Web, it is very useful to use a compression format, such as JPG, to prevent the image from being too heavy (and thus taking a long time to load), while preserving the pixel dimensions of the image and maintaining good quality control.
Printer resolution
To indicate the resolution of a printer, PPI is not used (pixel as a unit only makes sense on the screen) but DPI (Dots per Inch), or dots of ink per inch.
Generally speaking, the higher this value, the greater the degree of detail in the prints produced.
PPI vs DPI
PPI and DPI, on-screen resolution and printer resolution, are thus two distinct but nevertheless related values. The standard for a quality print is 300 ppi. With an inkjet printer, good results can be obtained even at 220 ppi, but it is best never to go below 150 ppi, then the pixels become obvious and what was a sharp image on screen, on paper appears ‘muddy’ if not pixelated.
Depending on the type of media you are going to print on, the resolution required to get a sharp image also varies. On a glossy coated paper, imperfections will be much more visible than on a canvas, for example, so the former will be much more intransigent about resolution than the latter.
Image compression formats (bmp, tiff, jpg)
To maintain good quality in the image but keep it from taking up too much space, compression comes into play. There are formats, such as TIFF and BMP, that do not involve compression and retain all the pixels in an image. These formats are ideal if image quality is the priority, at the expense of how much space it takes up. If, on the other hand, you want to reduce the file size, you may decide to use a compression format such as JPG, which also allows you to determine how much you want to compress. The JPG compression method analyzes the image in blocks of pixels and for each block reduces the number of pixels. Depending on the subject and the amount of detail and color in an image, the compression will be more or less effective.
JPG compression maintains the physical size of an image and reduces the space it takes up on disk, but it must be done carefully, taking into account the intended end use of the image, because it goes to sacrifice the quality and sharpness of the image.

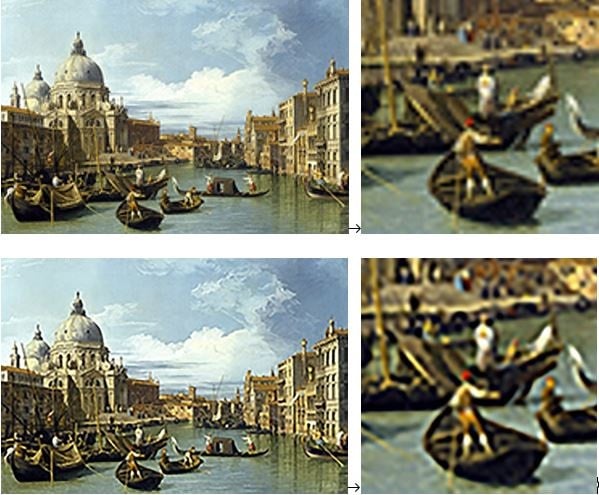
The same image, with identical resolution (150ppi) and size (259 x 295 px) but different jpg compression factors. Although the number of pixels is the same, the grid of squares used to compress is clearly visible in the image on the right.
How to take action to improve the resolution of an image
What to do when the resolution of the image you want to print is too low for the predetermined size? The short answer is that, unfortunately, there is nothing you can do. Nothing turns out as amateurish and sloppy as a low-resolution, pixelated printed image. The best option is definitely to shrink it down until it reaches a resolution suitable for printing.
However, if you really need to use the image in a specific size despite the low resolution, there are small tricks that can help you achieve a better result. These are not tricks that solve the problem, but expedients to minimize the damage.
1.Resampling the image.
Resampling can be done in Photoshop and involves changing the amount of pixels in an image. It can be done to reduce the resolution of an image in order to make it lighter, but it can also be done to increase its resolution. Apparently this is a perfect ploy to get around the problems brought about by resolution, but in reality this operation does not generate new details in the image, nor does it add sharpness. What the program does is go about generating new pixels from existing ones, ‘guessing’ what color they should take on.
This operation can be useful to avoid the pixel grid being noticeable, but the image will remain grainy. It may be useful to add some noise in post-production, but in general, it is best not to abuse this expedient and test whether it brings any real improvement.
The same image, at 216 x 147px and 72ppi (top), and at 1500 x 1021px and 300ppi, after being resampled (bottom), with relative zooms. As can be seen in the zoom, the resampled image does not have more detail, only more pixels.
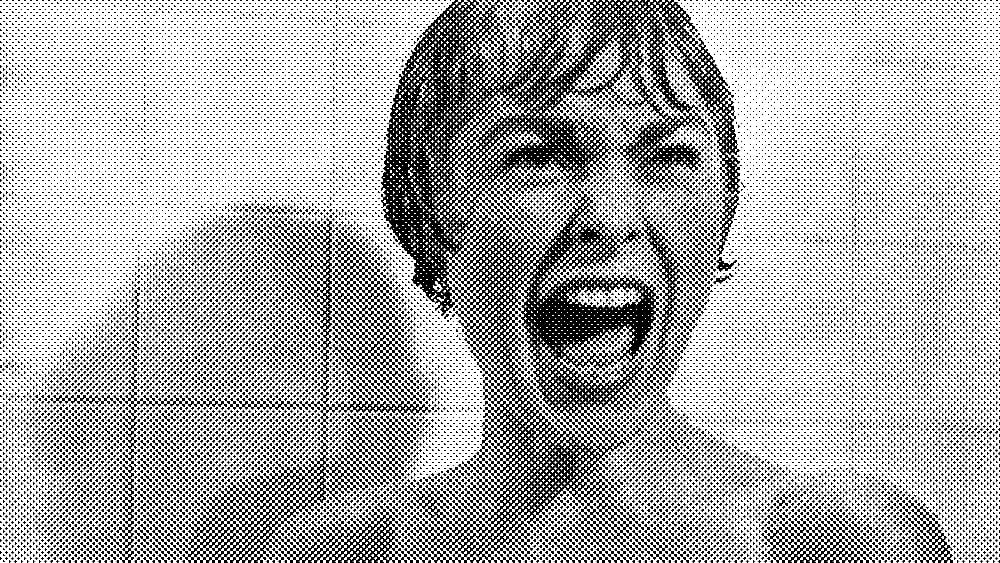
2.The halftone screen.
Another option is to keep the subject of the image, but use a special treatment, to avoid the grainy or pixelated appearance. The halftone screen is a treatment that can be done in Photoshop and consists of dividing the original into small, printed areas of a single color. Clearly this is not an option for every type of image and photo, but it can be very useful for black and white images.
The same image with a halftone screen applied (below).
3.Print and scan the image.
A final attempt worth trying is to print the image at one size with good resolution and then scan the print at high resolution to use it at a larger size. Enlarging the scanned image will make the ink dots visible, and while this is not ideal, it is in many cases better than the pixel grid.
Unfortunately, there are not many shortcuts when the resolution of an image is too low. The important thing, however, is to understand how resolution works and how it affects the printouts; in many cases it may become apparent that changing the image and choosing one at an appropriate size and resolution is a key step to a professional and effective printout.